The Essential Guide to Frit Painting!
 First of all, what is frit painting? Frit is crushed up pieces of glass. It comes in the same type and same colors of the regular glass we use in Kiawah’s Turtles’ Nest Art Studio. There are three types of frit: fine, medium and course. The course frit is too chunky for the detail in frit painting, but is occasionally used in regular glass fusing. The fine frit is almost a powder. It is good for a background or for added small details. The medium frit is perfect for frit painting!
To frit paint, you outline a design of your choice with GlassLine pen. GlassLine pens are another beneficial type of glass. It comes in a container that you can attach a few different size caps to which allows you to vary the thickness of your outline. So how do you frit paint? We have put together a guide of essential frit painting tips to get you started.
1) Pick a design!
For beginning frit painters, it’s a good idea to start with a more basic design. The small areas specifically are tricky to fill in with frit. It takes a lot of patience to arrange the frit, especially if there are a lot of small areas. However, you can always make your design bigger to fill the entire tile. The possibilities are truly endless when deciding what to frit paint. The only limitations are the colors! Sometimes it helps to know all of the colors that we have before you have your mind set on a specific color scheme, just to be sure!
2) Time to outline your design!
This is where you can pick if you want a thin line or a thick line. A thin outline is usually trickier because it requires steady hand pressure, however it also dries faster. A thick outline can be much easier because it can be done faster, but can also take longer to dry. The fan helps speed things up, as does a warm, sunny South Carolina day! The good news is that if you mess up, you can easily erase what went wrong. You simply wipe off the area with a Q-tip and fix it! If you really don’t like how it looks, you can also rinse off your tile and start over. It is sometimes helpful to practice first. Occasionally there will be an air bubble in the GlassLine pen that will cause a small splatter, but, thankfully, that is easily fixable.
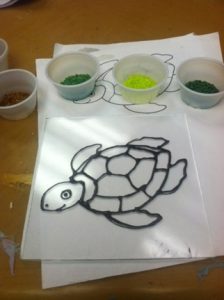
3) Prepare your colors!
While you are waiting for your outlined drawing to dry, it’s time to prepare your colors. If you haven’t already picked out which colors you want to use, now is the time. Once you have your colors, pour each into a small plastic cup. This makes it easier to pour your frit into the desired location, and to clean up the extra frit! We recommend starting with four basic colors, but you can always add more detail colors too.
4) Time to Frit Paint!
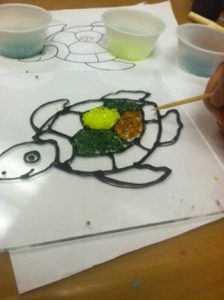
This is the tricky part! You pour and arrange the frit where you want it. Each person will find what technique works best. Some people like to work from the inside out, or some people like to work by color; it is completely personal preference. We also have tools, such as skewers, to help push the frit into the section you want it. This step tends to take some time, but is definitely worth it!
5) Glue Your Frit!
Quick! Before anyone bumps the table or sneezes, glue down your frit! It’s not really that fragile, but you want to make sure all your hard work stays where you want it. This is another place where frit painting is different than regular glass fusing. With frit painting, we put down the glue after the glass, instead of vice versa. This glue is more of a liquid since the frit is such small pieces of glass. The glue is dripped from the bottle onto the project. You can tell where the glue has dripped which is very helpful.
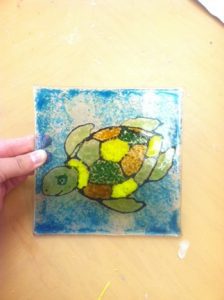
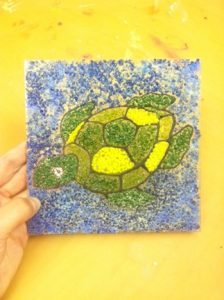
6) It’s time to fuse! Full fused or tac fused?
The picture on the left is “full fused” and the picture on the right is “tac fused.” You get to choose if you would like your design to be completely flat (full fused) or for the frit to stay defined and bumpy (tac fused). This can be a tricky decision! It comes down to what you want to use your design for in the future. Do you want it to be a sun catcher, a trivet, or something completely different? Which would go best with your design? Do you want to keep the bumpy texture to go with the feeling of the picture, such as a starfish?
 Some people like tac fusing their design because it is a different look than regular glass fusing. The full fuse frit painting is also unique, and you can’t really go wrong. If you are truly not sure, the best idea is to start with a tac fuse because you can always full fuse after that, but can’t go back to tac fuse after a full!
7) Admire your beautiful project!
A lot of time and effort went into your frit painting, and now you can show it off! Now that you know what frit painting consists of, you can start brainstorming for your next project. See you at the Turtles’ Nest Art Studio!
For the current class schedule or to make a reservation, please call 843.768.6001.


